Accessible Map Example
Table of Contents
- First Things First - Setting up the Map to Render in a Browser
- Drawing the Map with a Marker
- Marker Clustering
- Extending the Basic Map Attributes
In this example, I extend the accessibility of the Google Map API. This example is inspired by the Equal Entry blog post Accessible Maps on the Web.
First Things First - Setting up the Map to Render in a Browser
We have to crawl before we can walk and walk before we can run. The initial example I begin with is a basic map with a marker indicating a point on the map. To embed this on the page, I followed the Adding a Google Map with a Marker to Your Website tutorial on the Google Maps API. This example uses some basic markup to embed the map.
At a high level, the following steps must be taken to get a basic map with a marker working:
- Create a file with a small amount of HTML, CSS, and JavaScript. Save the file with a .html extension.
- In the Google Cloud Platform Console, set up a project and enable the Maps JavaScript API in your project. Google typically gives about $300 in credits to start with and the cash value per page view count is nominal (fractions of a penny for requests in the thousands). More information can be found on the Maps JavaScript API Usage and Billing page.
- Once you have an account, you need to generate an API key. This allows your served requests to be tracked.
- Note: It is a Best Practice to Protect your API key. This keeps your key from being used elsewhere maliciously.
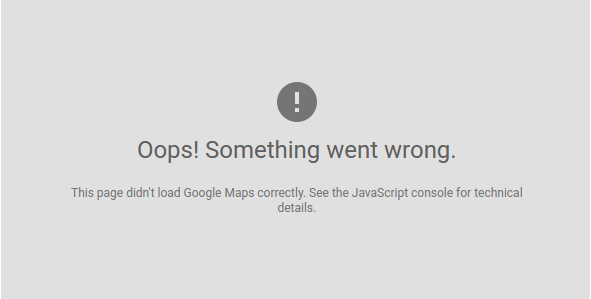
Most of the important information is documented in the tutorial in the Maps JavaScript API however there are a few important notes. First, the billing is listed as optional. When I set this up, I was only able to serve the map twice. After that, the map shows an error saying the map didn't load correctly. You can troubleshoot this and learn more about the error in the Developer Console in your browser as well as the Google Cloud Platform Console, linked in the tutorial. In order to serve the map, you must now have billing set up with an account. Once this has been set up, requests to the API will be served and your usage will be tracked in the Google Cloud dashboard for the Map API.
Unfortunately, this means that you can no longer generate the map locally as it must be tracked through the Google Cloud Platform. The markup will load briefly when running the example locally then show an error that the map could not be displayed (shown below). For this example to work properly, I had to host the page and follow the aforementioned steps.

IMAGE: Google Maps Request Error
Drawing the Map with a Marker
The first thing we do in our HTML file is create a <div> element with the ID "map". This will be where the map is drawn. We then apply some CSS styling to determine the size of the map.
In our JavaScript, we create variables and set the parameters for the map to be drawn. In the example below, I've created a variable called "dc" in which I've passed the latitude and longitude of Washington, DC. I then set the default zoom level and set the center of the map to be the variable for DC. Last, I add the marker at the DC position.
HTML:<div id="map"></div>CSS:
<script async defer src="https://maps.googleapis.com/maps/api/js?key=[YOUR KEY]&callback=initMap"></script>
#map {
    height: 400px;
    width: 100%;
}
JavaScript:
// Initialize and add the map
function initMap() {
  // The location of Washington, DC
  var dc = {lat: 38.893, lng: -77.036};
  // The map, centered at Washington DC
  var map = new google.maps.Map(
    document.getElementById('map'), {zoom: 10, center: dc});
  // The marker, positioned at Washington DC
  var marker = new google.maps.Marker({position: dc, map: map});
}
Marker Clustering
In this example, we place clusters to indicate groups of local markers. We place a <div> with an ID to render the map and style it just like in the previous example. I've also moved the script call,<head> of the document.
The full markup of the JavaScript for rendering both maps can be seen at https://jsfiddle.net/robertmc/hu29a4z8/.
HTML:<!-- In the <head> section -->CSS:
<script async defer src="https://maps.googleapis.com/maps/api/js?key=[YOUR KEY]&callback=initMap"></script>
<script src="https://developers.google.com/maps/documentation/javascript/examples/markerclusterer/markerclusterer.js"></script>
<script src="https://unpkg.com/@google/markerclustererplus@4.0.1/dist/markerclustererplus.min.js"></script>
<!-- In the <body> section -->
<div id="mapCluster"></div>
#mapCluster {
    height: 400px;
    width: 100%;
}
JavaScript:
// Initialize and add the map
function initMap() {

// The location of Uluru
var uluru = {lat: -28.024, lng: 140.887};

var locations = [
    {lat: -31.563910, lng: 147.154312},
    {lat: -33.718234, lng: 150.363181},
    {lat: -33.727111, lng: 150.371124},
    {lat: -33.848588, lng: 151.209834},
    {lat: -33.851702, lng: 151.216968},
    {lat: -34.671264, lng: 150.863657},
    {lat: -35.304724, lng: 148.662905},
    {lat: -36.817685, lng: 175.699196},
    {lat: -36.828611, lng: 175.790222},
    {lat: -37.750000, lng: 145.116667},
    {lat: -37.759859, lng: 145.128708},
    {lat: -37.765015, lng: 145.133858},
    {lat: -37.770104, lng: 145.143299},
    {lat: -37.773700, lng: 145.145187},
    {lat: -37.774785, lng: 145.137978},
    {lat: -37.819616, lng: 144.968119},
    {lat: -38.330766, lng: 144.695692},
    {lat: -39.927193, lng: 175.053218},
    {lat: -41.330162, lng: 174.865694},
    {lat: -42.734358, lng: 147.439506},
    {lat: -42.734358, lng: 147.501315},
    {lat: -42.735258, lng: 147.438000},
    {lat: -43.999792, lng: 170.463352}
]

// Create an array of alphabetical characters used to label the markers
var labels = 'ABCDEFGHIJKLMNOPQRSTUVWXYZ';

// The map, centered at Uluru
var mapCluster = new google.maps.Map(
    document.getElementById('mapCluster'), {zoom: 3, center: uluru});

    // Add some markers to the map.
    // Note: The code uses the JavaScript Array.prototype.map() method to
    // create an array of markers based on a given "locations" array.
    // The map() method here has nothing to do with the Google Maps API.
    var markers = locations.map(function(location, i) {
        return new google.maps.Marker({
            position: location,
            label: labels[i % labels.length],
            map: mapCluster
        });
    });

    //Add a marker clusterer to manage the markers.
    var markerCluster = new MarkerClusterer(mapCluster, markers,
    {imagePath: 'https://developers.google.com/maps/documentation/javascript/examples/markerclusterer/m'});
}
Extending the Basic Map Attributes
We need to add various attributes to the map marker to ensure screen readers can identify the control's name and expected behavior
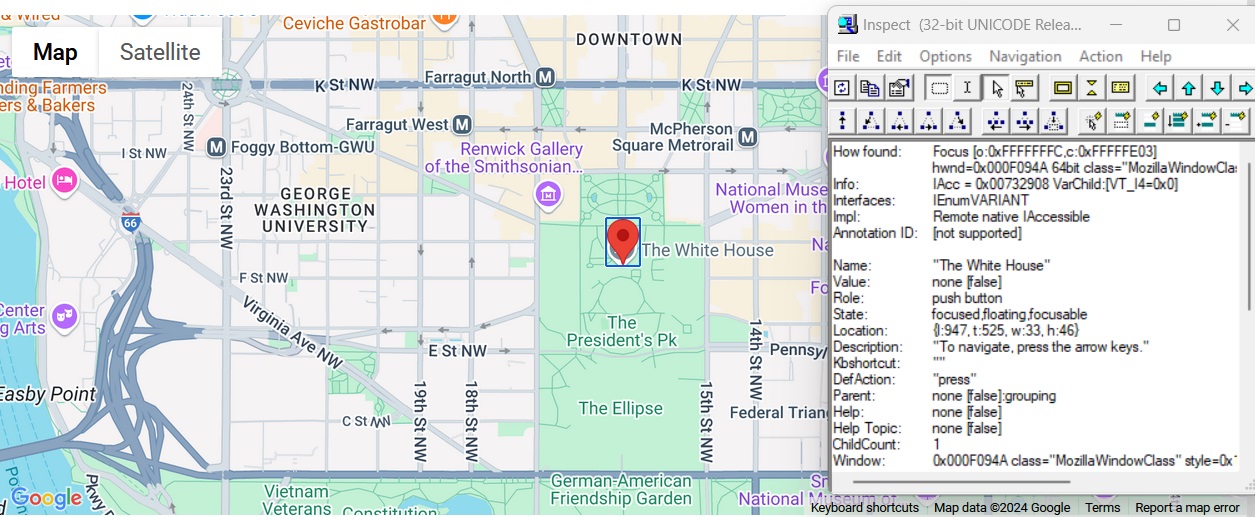
The tabindex="0" markup adds the marker to the keyboard focus order. The value of 0 means that the tabindex value is the order in which the content appears in the DOM. The role="button" markup ensures assistive technology can identify the control's role as that of a button. The aria-label markup applies an accessible name to the control.
function makeKeyboardAccessible(element) {

    element.setAttribute("tabindex","0");
    element.setAttribute("role","button");
    element.setAttribute("aria-label",element.title);

    element.addEventListener("keydown", function(ev){
        var key = ev.keyCode || ev.which;
        if(key == 13 || key == 32){
            var event = document.createEvent('HTMLEvents');
            event.initEvent('click', true, false);
            this.dispatchEvent(event);
        } else if (key == 40) {//down
            map.panBy(0, panY);
        } else if (key == 38) {//up
            map.panBy(0, -panY);
        } else if (key == 37) {//left
            map.panBy(-panX, 0);
        } else if (key == 39) {//right
            map.panBy(panX, 0);
        } else {
            return
    }
    ev.preventDefault();
});
This listens for a click event to open the marker. The click event also provides keyboard support.
JavaScript:marker.addListener('click', function() {
infowindow.open(map, marker);
});
To Test
To test this using the keyboard:
- Press Tab and Shift + Tab to navigate forwards and backwards between the actionable elements.
- Navigate to the marker and press Enter to activate the dialog. Dialog best practices are followed:
- Focus is moved to the dialog as a whole when opened.
- Keyboard focus is not contained within the dialog because it is a non-modal dialog opposed to a modal dialog.
- The keyboard can be used to close the dialog. Either the "X" button can be activated or the ESC key can be used.
- When closing the dialog, focus properly returns to the element that spawned it (the marker).

IMAGE: Embedded Google map with marker highlighted in focus. The MSAA Object Inspector is visible showing the accessible properties.